How to Make a Terrarium in 6 Easy Steps
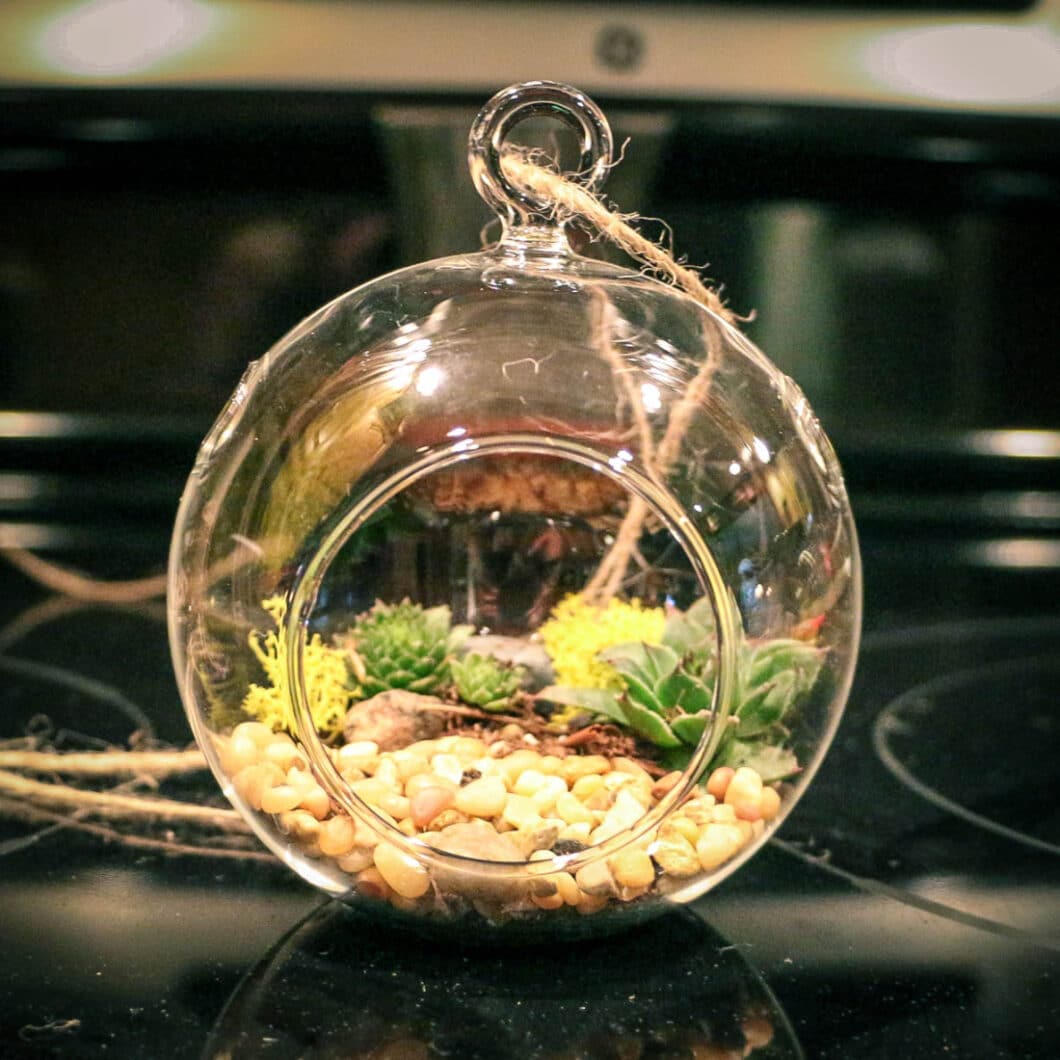
Brace yourselves – I’m getting crafty for a moment! Today, I’m going to talk about how you can make your own terrarium in 10 minutes flat, with several easy steps. That’s all it took for me to make the one in the photo above.
I know I’m not usually posting any how-to posts or getting too crafty, but this is something that I really wanted to share with you guys because I have so much fun making these! My mom showed me how to make them, and it is such a blast! They are perfect as gifts. And I do not have a crafty bone in my body, but I can still crank out a pretty decent looking terrarium, haha.
So, let’s start off with what exactly you’ll need to make these lovely little guys. You can buy it all online or in-store. (I’ll talk about both.)
What you need for your terrarium:
*Potting soil: You can pick this up anywhere they sell garden supplies. I found mine at Walmart. You can also order it, here.
*Globe: Amazon, or your local Goodwill can have them occasionally.
*Fish tank gravel Any pet store, or you can order it here.
*Hens & Chicks cluster I just picked a few from my mom’s backyard, but these are readily available at any greenhouse. Or click here to order them.
*Petrified moss: I found mine at Steins (a greenhouse), but you can also order it from Amazon in a wide variety of colors.
*Small sticks and rocks: Check outside 🙂
*Roll of twine: Any craft store, or click here.


How to make the terrarium:
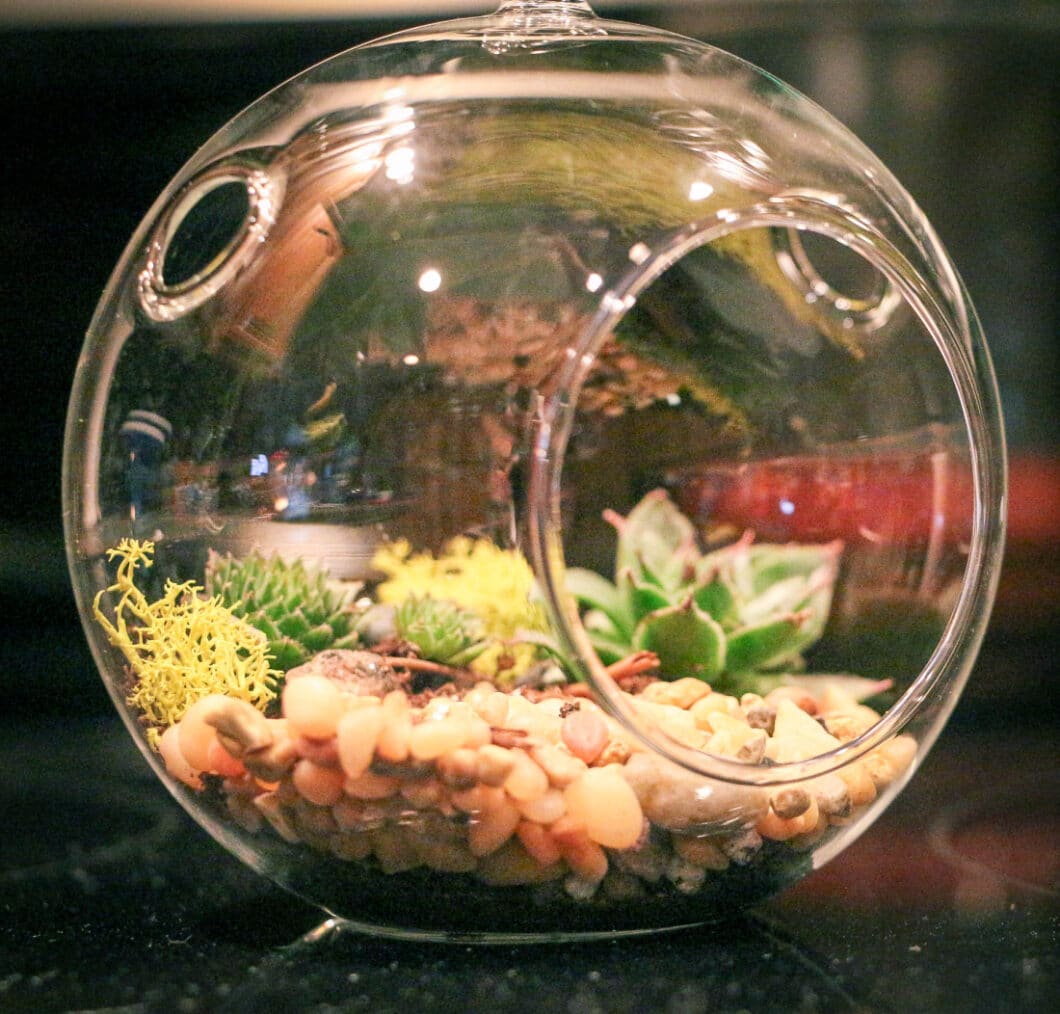
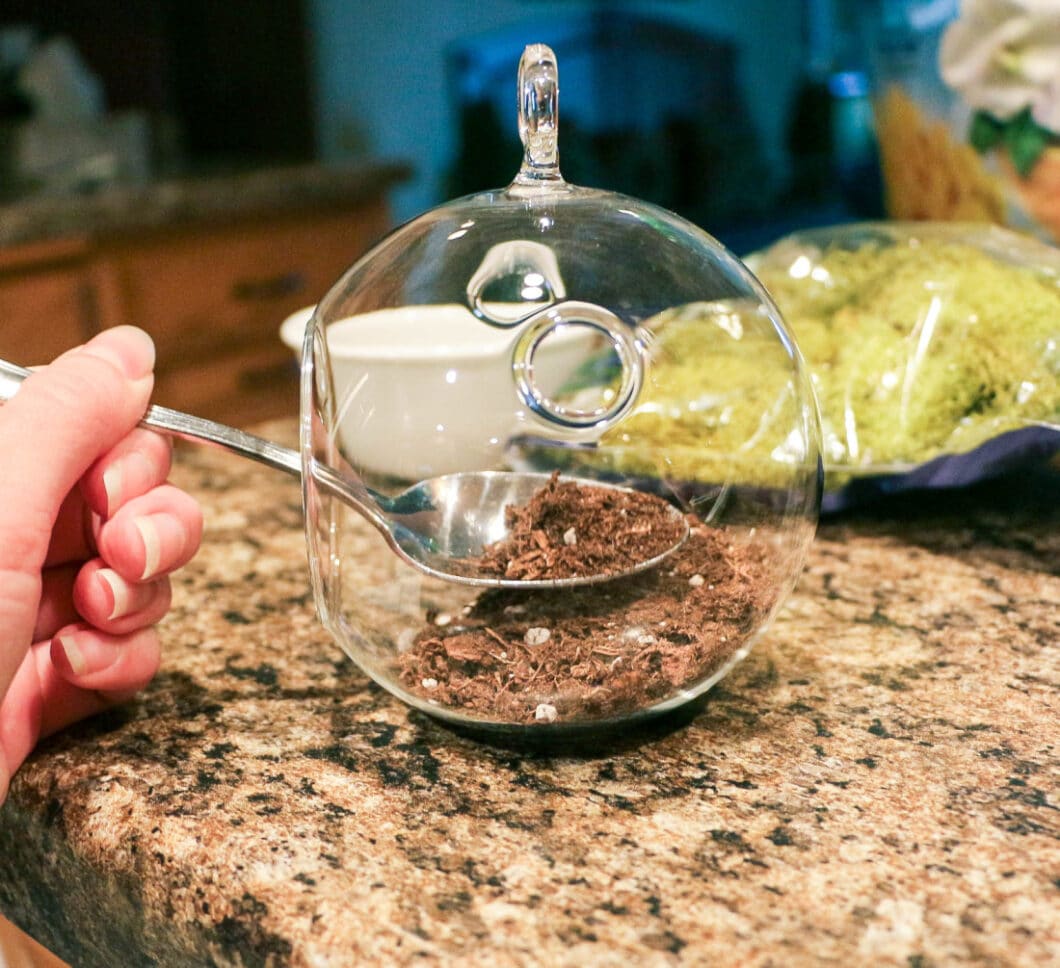
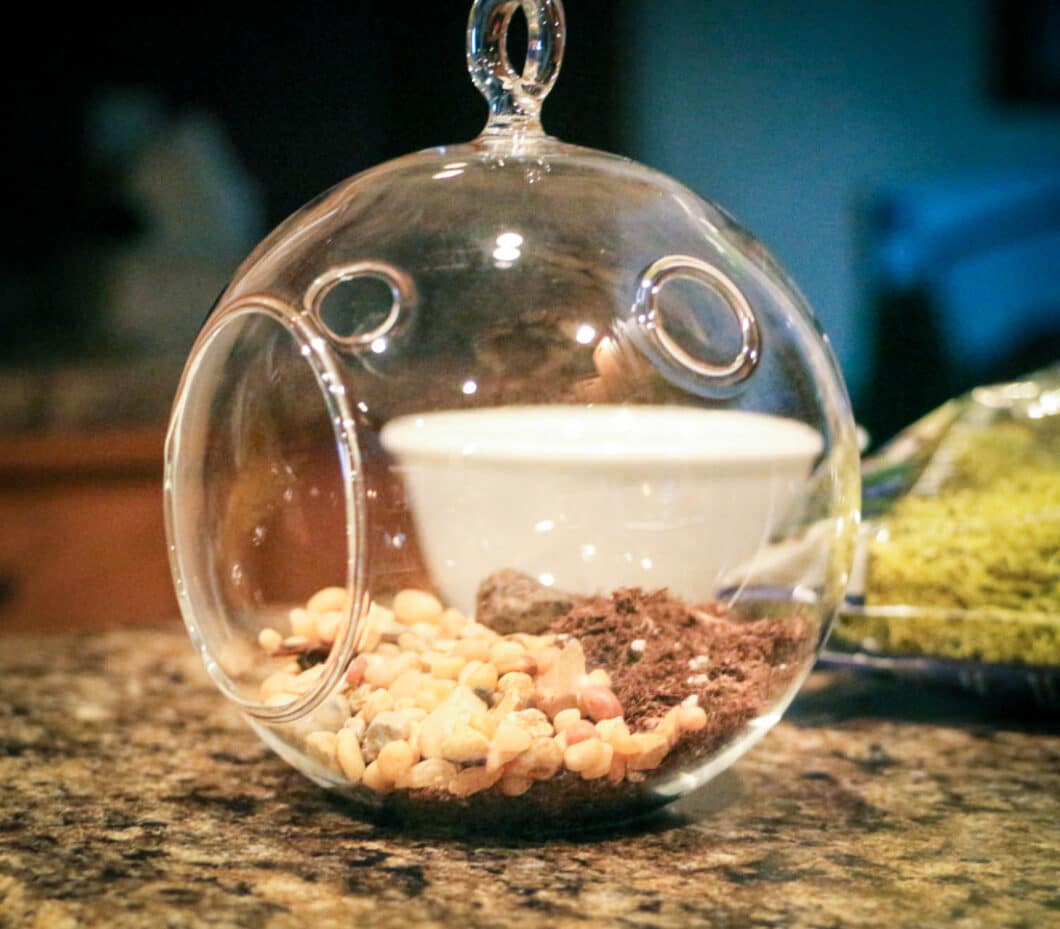
*Step 1: You’ll first take a spoon and make “a little dirt hill.” You’ll build up the dirt so there is enough room for the hens and chicks to get their roots covered. You don’t need to fill in the front of the terrarium with dirt, because you will put your aquarium gravel there. Admittedly, I could have used more dirt for my terrarium. (Whoops!)
*Step 2: Add your aquarium gravel to the front of the terrarium (just make sure you don’t add so much that it is spilling out the front).
*Step 3: Add your hens & chicks to the dirt part of the terrarium. I usually add 3 to mine. 1 larger one and 2 smaller ones. Also, the roots may be huge on these succulents. You can trim them to fit the size of your terrarium, and it will not hurt them. (I promise! These little guys are very resilient.) I always have to trim the roots. And just make sure the roots are covered when you plop them into the dirt.
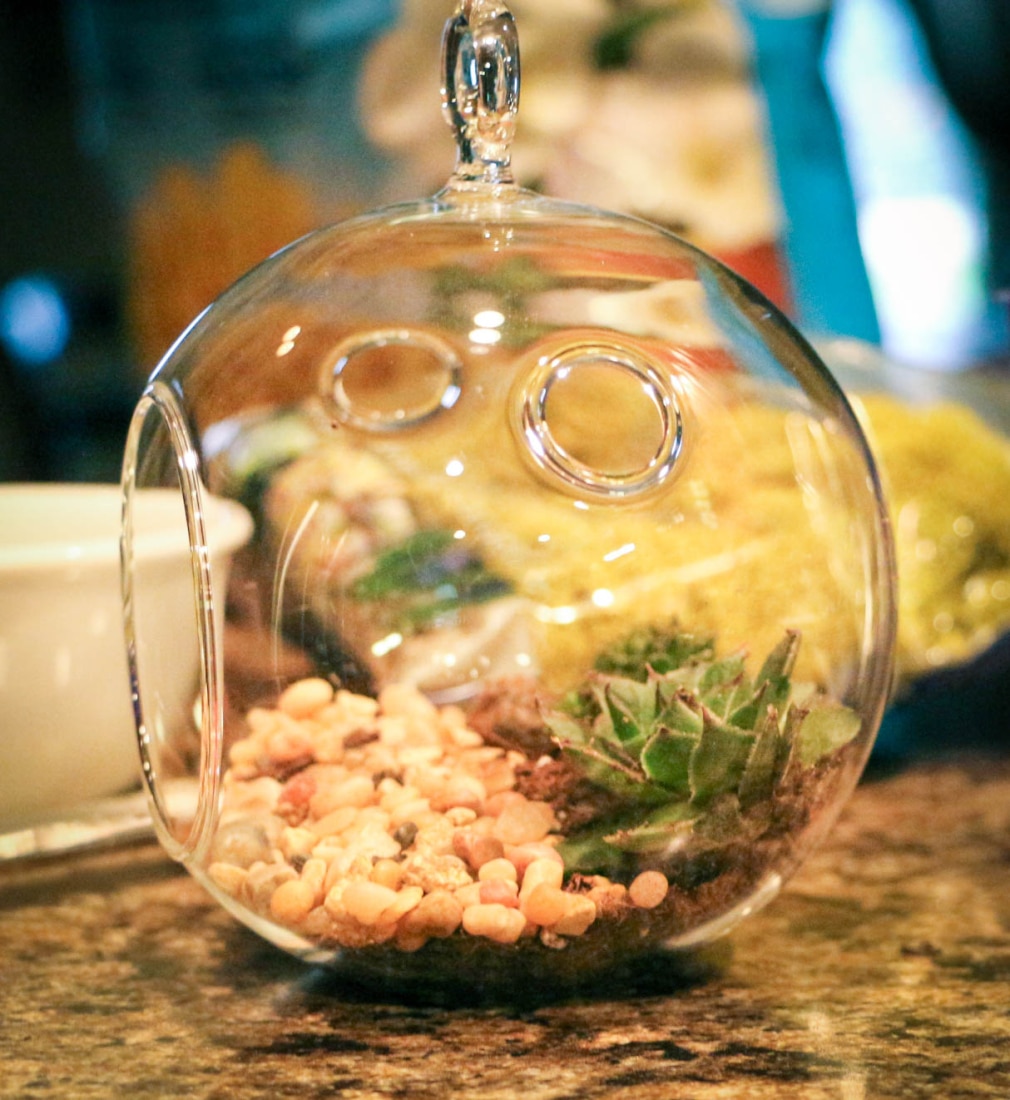
Step 4: Get creative! This is the part where you can make your terrarium unique. Add the petrified moss for a pop of color. You can also add a couple rocks and small sticks for some texture.
*Step 5: Take a couple small spoonfuls of water to the dirt part of your terrarium. This will help to keep your hens & chicks from shifting if you’re taking your terrarium to a holiday event as a gift (trust me, I found this out the hard way – water them before leaving). This is also how you will water your terrariums. They just need a couple spoonfuls of water weekly or every other week.
*Step 6: Add the twine. I almost always forget this step. Haha. If you’re giving them as a gift, make the twine quite long…whoever is receiving it can always cut it short if they want.
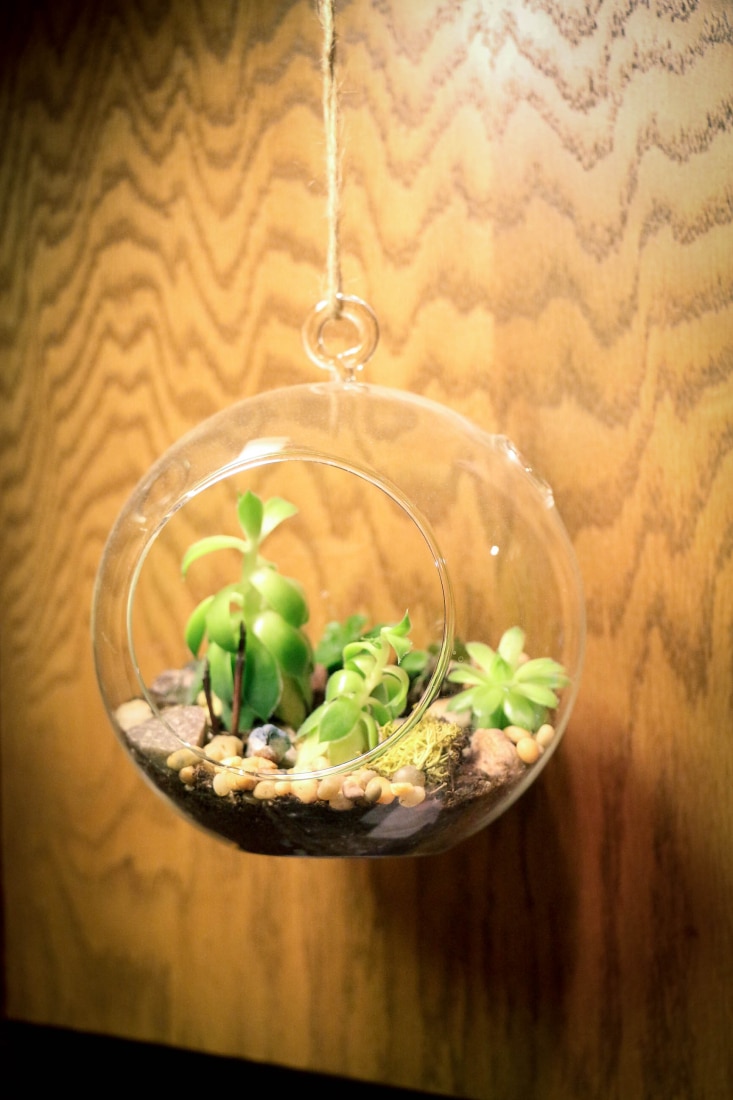
And that’s it! How easy is that? The terrarium pictured above is a larger one my mom made a few months ago. As you can see, the hens and chicks thrive in these terrariums! Be prepared to potentially re-home them, as they can sometimes get very tall (these had started out as the same size as the ones pictured in my terrarium).